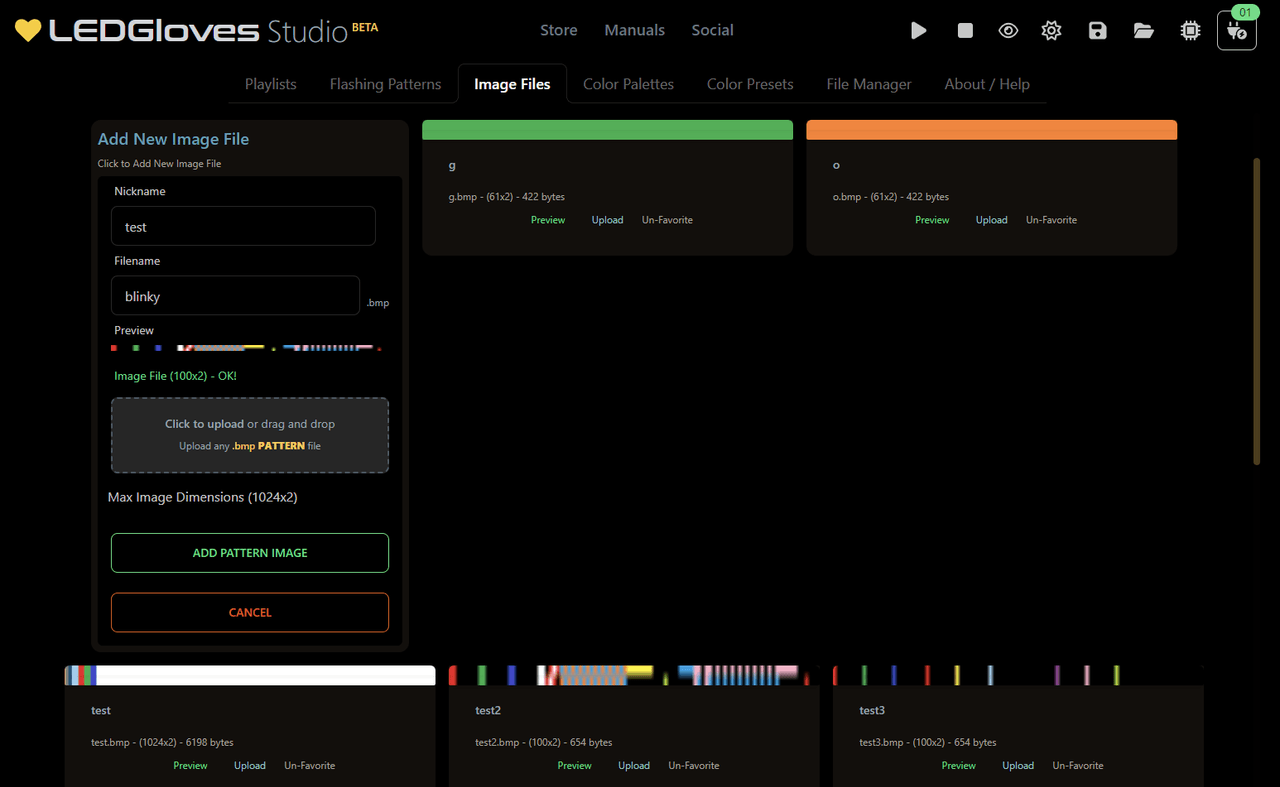
Using Image Files
Your chip can display bitmap image files. These image files have a row of pixels, with each row being a sequence of colors for that LED on a chip. The first row represents data for the first LED, the second row represents data for the second LED, and so on. The image files are saved as .bmp files, and can be created in any image editor.
Chips with only one LED will only use the first row of pixels in the image file. Chips with two LEDs will use the first two rows of pixels in the image file, and so on. This lets you create a single image file that can be used on any chip, regardless of how many LEDs it has. If a Multi-LED chip is used with a single LED image file, the first LED will display the image, and the remaining LEDs will duplicate that color data as well.

Usage in Playlists
Image files can be used in playlists just like any other pattern preset. Simply call the image file by name in the playlist, and it will be displayed on the chip. The image file will be displayed on the chip until the next pattern in the playlist is called. Below is an example of using an image pattern in a playlist.
image_name.bmp,Check out Advanced Usage for more information on how to use image files in playlists.
Image File Format
Currently, only bitmap files are supported with the .bmp file extension. If you’d like to use a different file format, you can convert it to a bitmap file using an image editor like GIMP.
Images play on a loop, starting with the pixel colors on the left of the image, and cycling through the colums of the image to the right for each frame shown on the chip. The maximum width of an image file is 1024 pixels. This roughly works out to about 1 second of looping color data.
| Image Attribute | Max Value | Required Value | Description |
|---|---|---|---|
| Width | 1024 | - | The width of the image in pixels. |
| Height | # of LEDs (2 for Synergy) | - | The height of the image in pixels. |
| Bits Per Pixel | 24-bit (RGB 8-bit color) | Must Be 24-bit | Bits per pixel in the image. |
| Color Type | RGB only | Must Be RGB | Color type of the image. |
| Compression | None | No Compression | Image must not be compressed. |
Checking Image Compatibility
Images can be checked for compatability in the studio. You can also upload image files to your chip using the Studio, or by manually transferring the file over USB to the /patterns/ folder on your chip.
Advanced Usage
Instead of calling an image file directly in a playlist, you can also call an Intermediate Preset File that calls the image file. This is useful if you’d like to easily change up the image across different chips. See the Pro Tip below for more information.
Images in the Studio
You can save images to your devices by hovering over the Upload button and selecting your devices. Any device conected to USB is available to save to. Image files cannot be transferred wirelessly and must be transferred over USB.
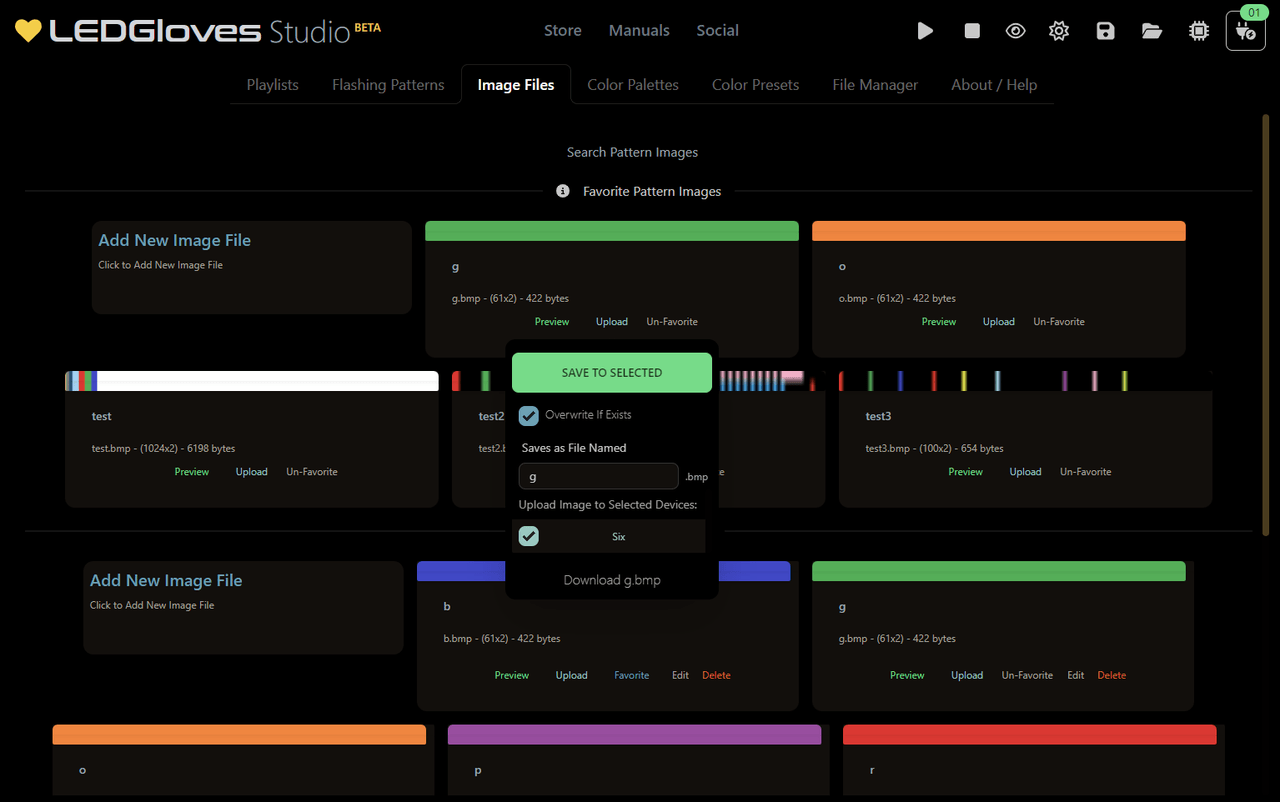
You can select what devices connected over USB you’d like to save the image to. Before uploading, you can also change the filename of the image file that is saved on the devices if you’d like. Once you’re ready, click the Upload button to save the image to your devices. We recommend previewing the image in the studio after uploading to make sure it looks correct.