
Images
Besides patterns made in Studio, your chip can play images: small pictures that you draw pixel by pixel. Each column of the picture is one moment in time, so the chip “plays” the image from left to right, over and over. Images let you make patterns the pattern editor can’t, such as an exact sequence of colors.
How an Image Becomes a Pattern
Section titled “How an Image Becomes a Pattern”- Each row is one LED. The top row of pixels is the first LED (the front LED on Synergy), and the second row is the second LED (the back LED on Synergy).
- Each column is one moment. The chip shows one column at a time, from left to right, then loops back to the start.
- Width is length. An image can be up to 1024 pixels wide, which plays for about 1 second before it loops.
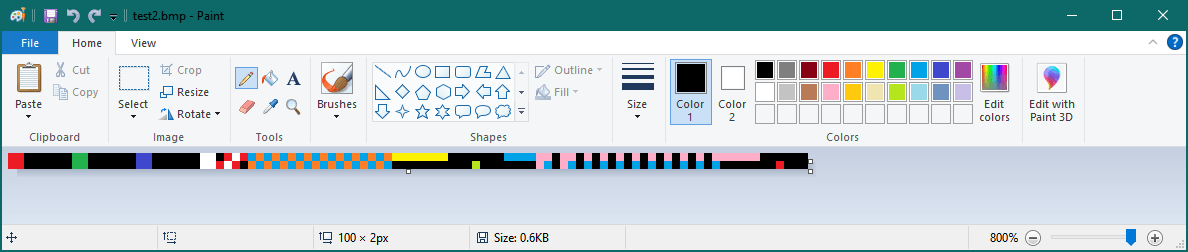
A chip only uses as many rows as it has LEDs. A Synergy chip has 2 LEDs, so it uses the top 2 rows and ignores the rest. This means one image works on any chip. If an image has only one row, a chip with more LEDs shows that row on all of its LEDs.
Step 1: Make the Image
Section titled “Step 1: Make the Image”You can make pattern images in any image editor that lets you edit single pixels and save as a bitmap (.bmp) file. Free options include Microsoft Paint and GIMP.
- Make a new image. Set the height to the number of LEDs on your chip (2 for Synergy) and the width to how long you want the pattern to be (up to 1024).
- Zoom in and color each pixel.
- Save the image as a 24-bit bitmap (
.bmp) file.
Your image needs to meet these requirements:
| Setting | Requirement |
|---|---|
| File type | .bmp (bitmap) |
| Width | Up to 1024 pixels |
| Height | Your chip’s number of LEDs (2 for Synergy). Studio accepts up to 128. |
| Color depth | 24-bit (RGB) |
| Compression | None |
Step 2: Add the Image to Studio
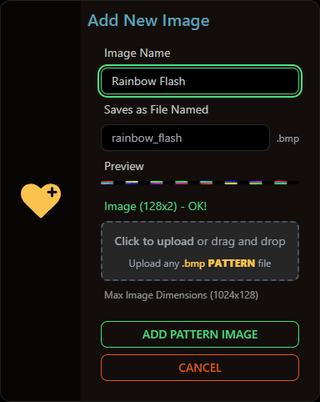
Section titled “Step 2: Add the Image to Studio”- Open LEDGloves Studio and click the Images tab.
- Under Your Images, click the Add New Image card.
- Enter an Image Name. This is the name you’ll see in Studio.
- Check Saves as File Named. This is the name the image will have on your chip. File names can’t contain spaces.
- Click the upload area to choose your
.bmpfile, or drag the file onto it.- If the file works, Studio shows a Preview strip and the image’s size followed by OK!
- If not, Studio shows what’s wrong. Check the requirements above.
- Click Add Pattern Image.
Step 3: Upload the Image to Your Chip
Section titled “Step 3: Upload the Image to Your Chip”- Connect your chip to your computer with the programming cable.
- On the image’s card, hover over Upload. The upload panel opens.
- Check Saves as File Named. You’ll use this name to add the image to a playlist.
- Turn on Overwrite If Exists to replace an image with the same name that’s already on the chip.
- Under Upload Image to Selected Devices, check each chip you want to send it to.
- Click Save To Selected.
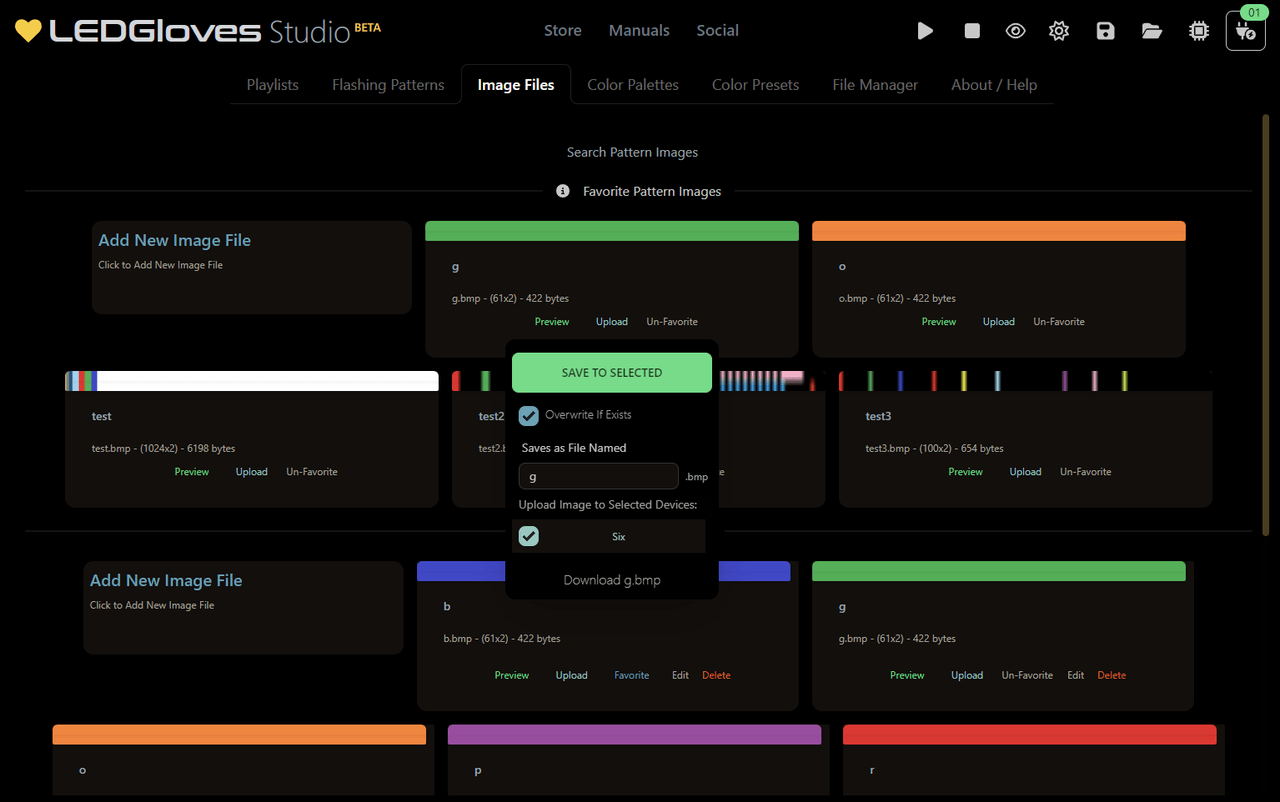
After uploading, we recommend playing the image on your chip to make sure it looks right. Click Preview on the image’s card.
Copying images without Studio
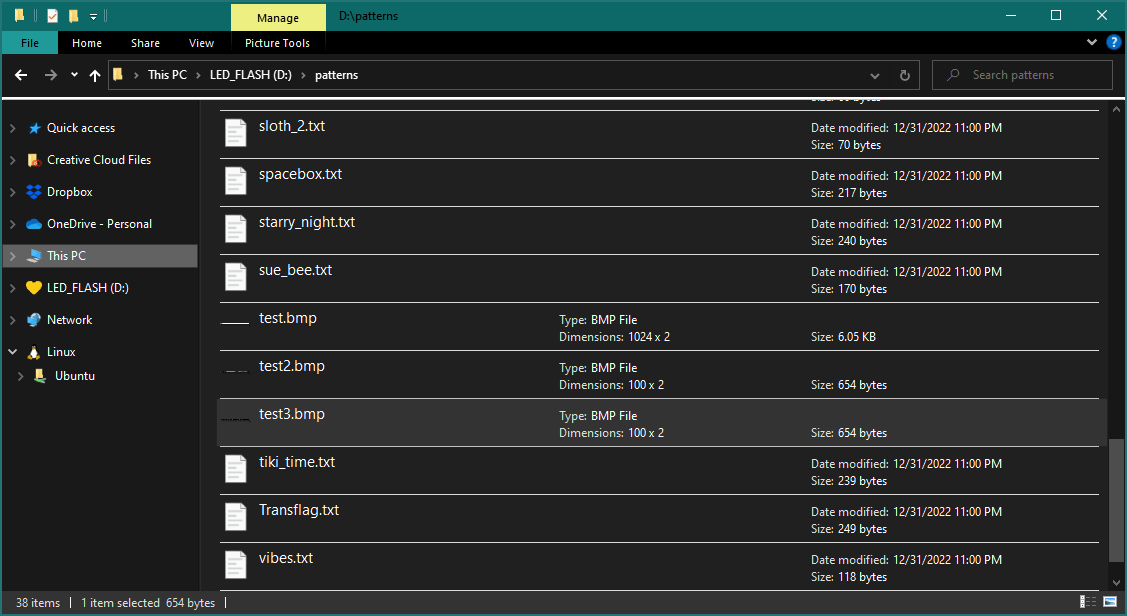
Section titled “Copying images without Studio”You can also copy images to your chip yourself. When your chip is connected over USB, it shows up on your computer as a USB drive called LED_FLASH. Copy your .bmp files into its patterns folder.
Step 4: Add the Image to a Playlist
Section titled “Step 4: Add the Image to a Playlist”Once the image is on your chip, you can add it to a playlist. See Playlists. In the pattern list, images on your chip are marked On device only. You can also type the image’s file name, including .bmp, for example rainbow.bmp.
Unlike patterns made in Studio, images aren’t saved inside the playlist, so the image needs to be on every chip that plays the playlist.
Managing Your Images
Section titled “Managing Your Images”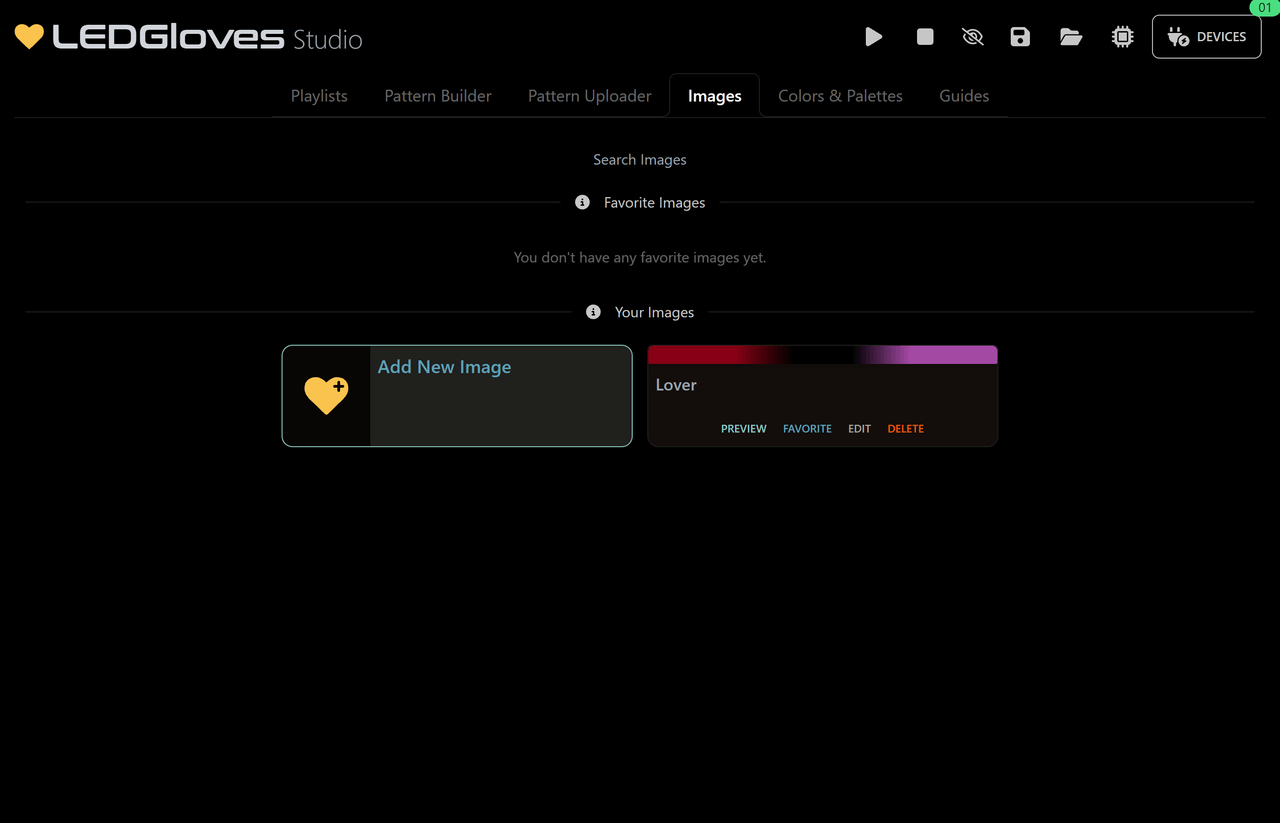
Each image card has these buttons:
| Button | What it does |
|---|---|
| Preview | Plays the image on your connected chips. The image needs to be on the chip already. |
| Favorite / Un-Favorite | Adds the image to, or removes it from, Favorite Images. |
| Edit | Changes the image’s name or file name, or swaps in a new file with Replace Image. Click Save Image when you’re done. |
| Delete | Removes the image from Studio. Click Confirm Delete Image to finish. This can’t be undone. |
Use Search Images at the top of the tab to find an image by name.