
Pattern Uploader
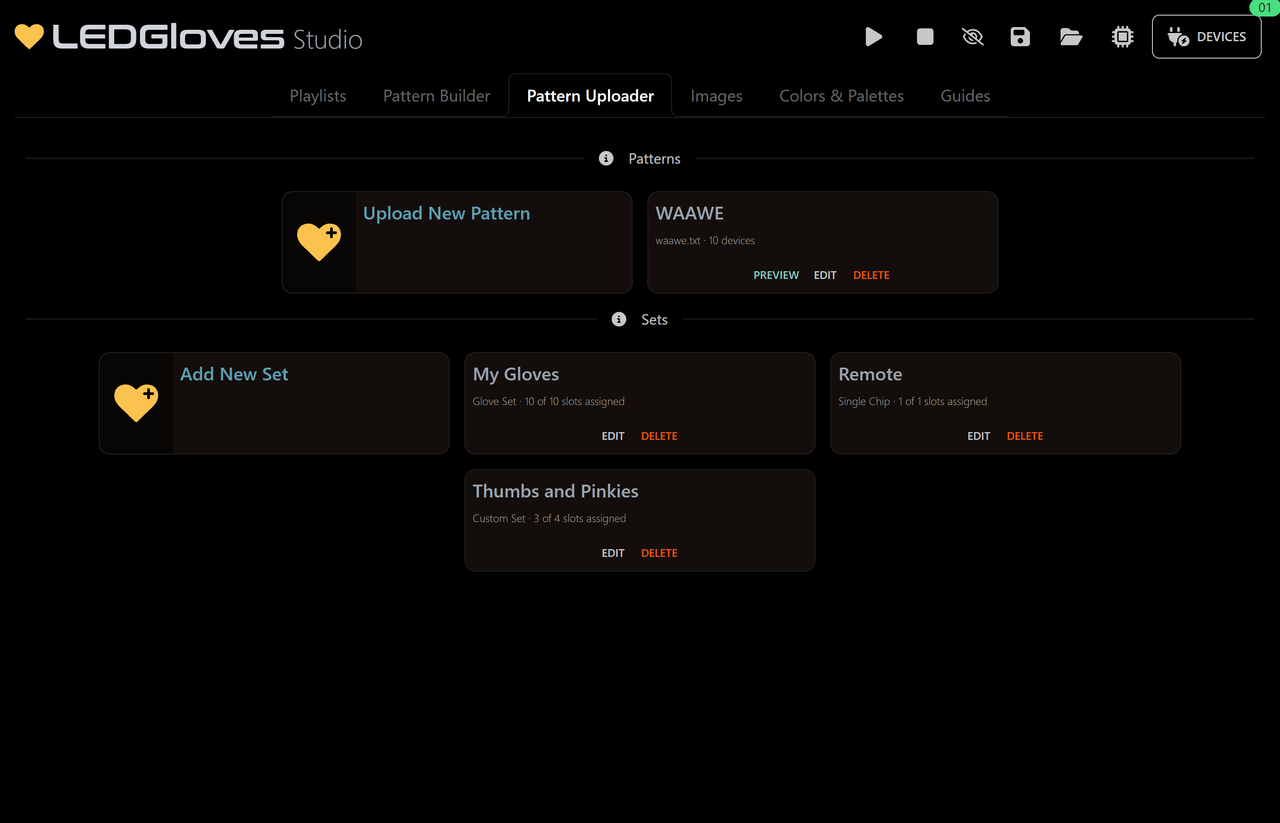
The Pattern Uploader tab of LEDGloves Studio sends patterns to your chips. It can give each chip in a prop its own pattern, all saved under one file name: a different color on each finger, or the poi heads doing something different from the handles. Put that file name in a playlist, and when it plays, every chip plays its part.
Each of these is a pattern upload. It’s also how you put the same pattern on all your chips: see Uploading One Pattern to Your Chips.
How Pattern Uploads Work
Section titled “How Pattern Uploads Work”When a chip plays a file from a playlist, it tells your other chips the file name to play, not the pattern itself. Each chip then plays its own file with that name.
A pattern upload uses this: Studio can save a different pattern on each chip under the same file name. When the file plays, every chip shows its own pattern, all at the same time.
Creating a Pattern Upload
Section titled “Creating a Pattern Upload”Step 1: Create the pattern upload
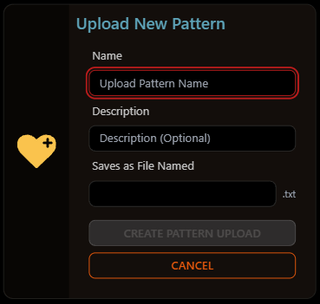
Section titled “Step 1: Create the pattern upload”- Open the Pattern Uploader tab. Under Patterns, click the Upload New Pattern card.
- Enter a Name (up to 40 characters).
- You can also add a Description.
- Saves as File Named fills itself in from the name, so you can usually skip it. File names can use letters, numbers, dashes (
-) and underscores (_), with no spaces. They can’t be the same as a regular pattern’s file name. - Click Create Pattern Upload.
If you don’t have a prop yet, the Pattern Uploader reminds you to add one in the Props tab first.
The pattern upload opens in the editor. The first time you open one, a Before You Send window reminds you to check that your chips are charged, on and paired, with one plugged in. Click Got It. It won’t show again for a day.
Step 2: Add your props
Section titled “Step 2: Add your props”Use the + Add Prop dropdown to add a prop. Each prop appears as its own group of slots. You can add more than one prop (for example your gloves and a pair of poi), up to 48 chips in total.
Click Remove Prop to take a prop out of this pattern upload. The prop itself isn’t deleted.
Step 3: Choose a pattern for each slot
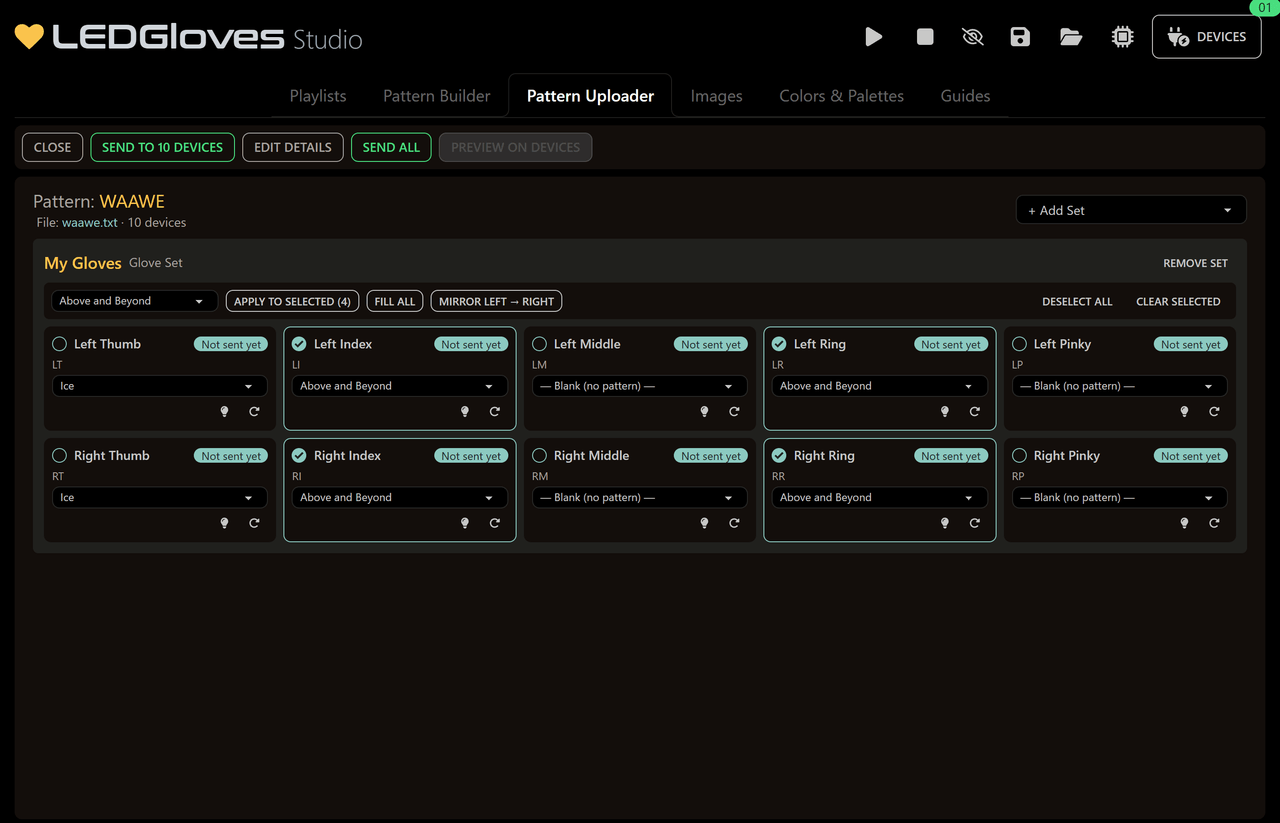
Section titled “Step 3: Choose a pattern for each slot”Every slot has a pattern dropdown:
- Patterns for this device lists the patterns made for that kind of chip.
- Other patterns lists everything else.
- — Blank (no pattern) — leaves that chip dark while the pattern upload plays.
To fill several slots at once, use the tools above a prop’s slots:
| Tool | What it does |
|---|---|
| Pattern dropdown | Choose the pattern the other tools use. |
| Apply to Selected | Uses that pattern for every slot you’ve ticked. |
| Apply to All | Uses that pattern for every slot in the prop. |
| Mirror Left → Right (Gloves) | Copies each left-hand finger’s pattern to the same finger on the right hand. |
| Copy Handle → Head (Poi) | Copies each handle’s pattern to its head. |
| Clear Selected / Clear All | Sets the ticked slots (or all slots) back to blank. |
| Deselect All | Unticks every slot. |
Step 4: Send it to your chips
Section titled “Step 4: Send it to your chips”- Make sure one chip is connected over USB.
- Click Send to N Devices. This only sends to chips that need it: ones that haven’t got it yet, or whose pattern you’ve changed. Click Send All to send to every chip.
- Each chip flashes green when it saves its pattern.
Chips that get the same pattern are sent it together, so sending is faster when slots share patterns.
If any slot is still blank, Studio warns you first (Some Devices Have No Pattern). Click Send Anyway if that’s what you want.
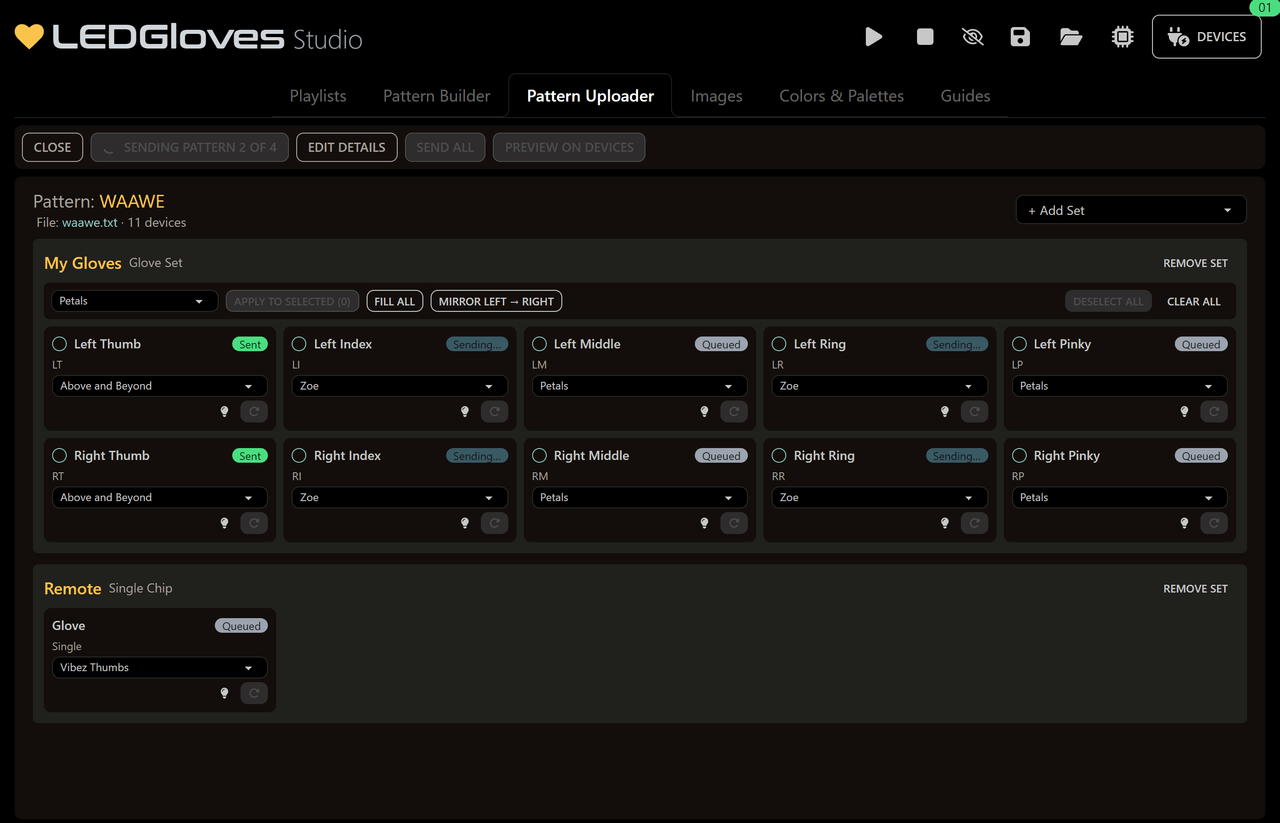
Each slot shows where it’s up to:
| Badge | Meaning |
|---|---|
| Sent | The chip has the latest version. |
| Out of date | You’ve changed this slot since it was sent. Send again. |
| Not sent yet | This chip hasn’t been sent this pattern upload. |
| No device | No chip is in this slot. Add one in the prop. |
| Unknown device | The chip in this slot hasn’t been plugged into this computer. |
| Queued / Sending… | Shown while sending. |
| Failed | The chip didn’t get it. Click the slot’s Resend button (the circular arrow) to try again. |
Step 5: Preview it
Section titled “Step 5: Preview it”Once every chip shows Sent, click Preview on Devices. Every chip plays its own copy of the file, so you can see the whole prop together.
Step 6: Add it to a playlist
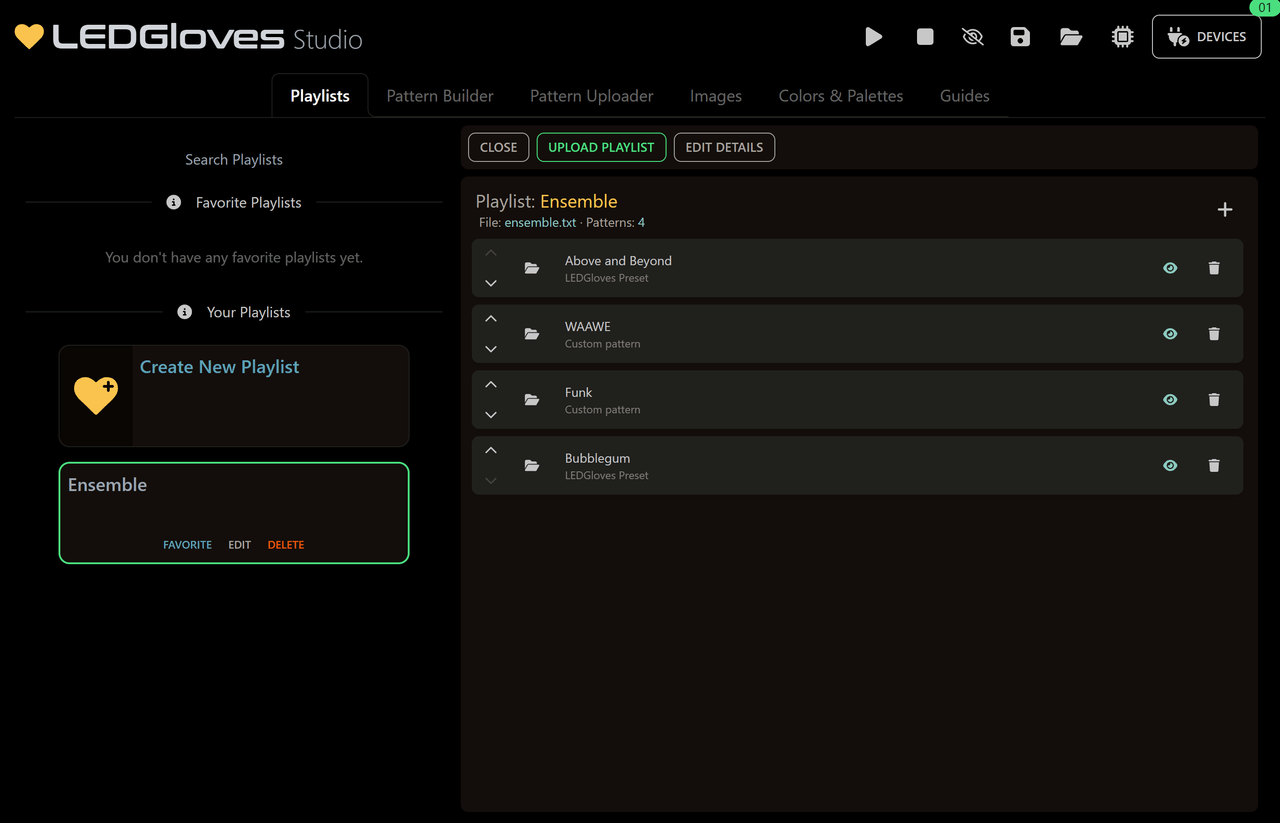
Section titled “Step 6: Add it to a playlist”- Open the Playlists tab and open a playlist.
- Add a row and click the folder icon. Your pattern uploads are listed under Custom Patterns.
- Click Use. The row shows the pattern upload’s name, with Custom pattern underneath.
- Upload the playlist.
Uploading One Pattern to Your Chips
Section titled “Uploading One Pattern to Your Chips”To put the same pattern on every chip in a prop:
- Set up a prop with your chips in the Props tab, if you haven’t already.
- In the Pattern Uploader, click Upload New Pattern, enter a Name and click Create Pattern Upload.
- Add your prop with + Add Prop.
- Choose the pattern in the dropdown above the slots, then click Apply to All.
- Click Send to N Devices.
Managing Your Pattern Uploads
Section titled “Managing Your Pattern Uploads”Every pattern card has these buttons:
| Button | What it does |
|---|---|
| Preview | Plays the pattern upload’s file on every connected chip. |
| Edit | Opens it, the same as clicking the card. |
| Delete | Removes it from Studio. Click Confirm Delete Pattern to finish. |
Deleting a pattern upload doesn’t remove the files from your chips. Playlists that use it keep playing whatever file the chips have under that name.
In the pattern upload editor, Edit Details changes the name, description or file name. If you change the file name, send the pattern upload again, and update any playlists that use it. They still point to the old file name.