
Props
A prop is a group of your chips, like a pair of gloves or a pair of poi, with each chip in a named slot (like Left Index or Poi 1 Head). You set up a prop once in the Props tab of LEDGloves Studio and reuse it.
The Pattern Uploader uses your props to know which chip is which, so it can send each chip its own pattern.
Setting Up a Prop
Section titled “Setting Up a Prop”Step 1: Open the Props tab
Section titled “Step 1: Open the Props tab”Open LEDGloves Studio and click the Props tab, the first tab at the top of the page. It lists your props.
Step 2: Create the prop
Section titled “Step 2: Create the prop”-
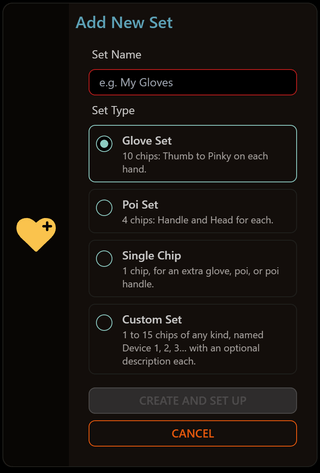
Click the Add New Prop card.
-
Enter a Prop Name, like My Gloves.
-
Choose a Prop Type:
Prop Type Chips Slots Gloves 10 Thumb to Pinky on each hand. Poi 4 Handle and Head for each poi. Single Chip 1 One chip, for an extra glove, poi head or poi handle. Choose its Chip Type. Custom Prop 1 to 48 Any mix of chips, named Device 1, 2, 3… Choose the Number of Devices. -
Click Create and Set Up.
Step 3: Read the checklist
Section titled “Step 3: Read the checklist”A Before You Start window opens with a short checklist:
- Plug each chip into this computer at least once, so Studio knows about it.
- Make sure every chip is charged and turned on (awake).
- Make sure all the chips are paired with each other (the same pairing key).
- Keep one chip connected with a USB cable. Studio sends to the others wirelessly through it.
Check each item, then click Next.
Click Cancel to go back to the form. Nothing is created until you click Next.
Step 4: Pick the chips in the prop
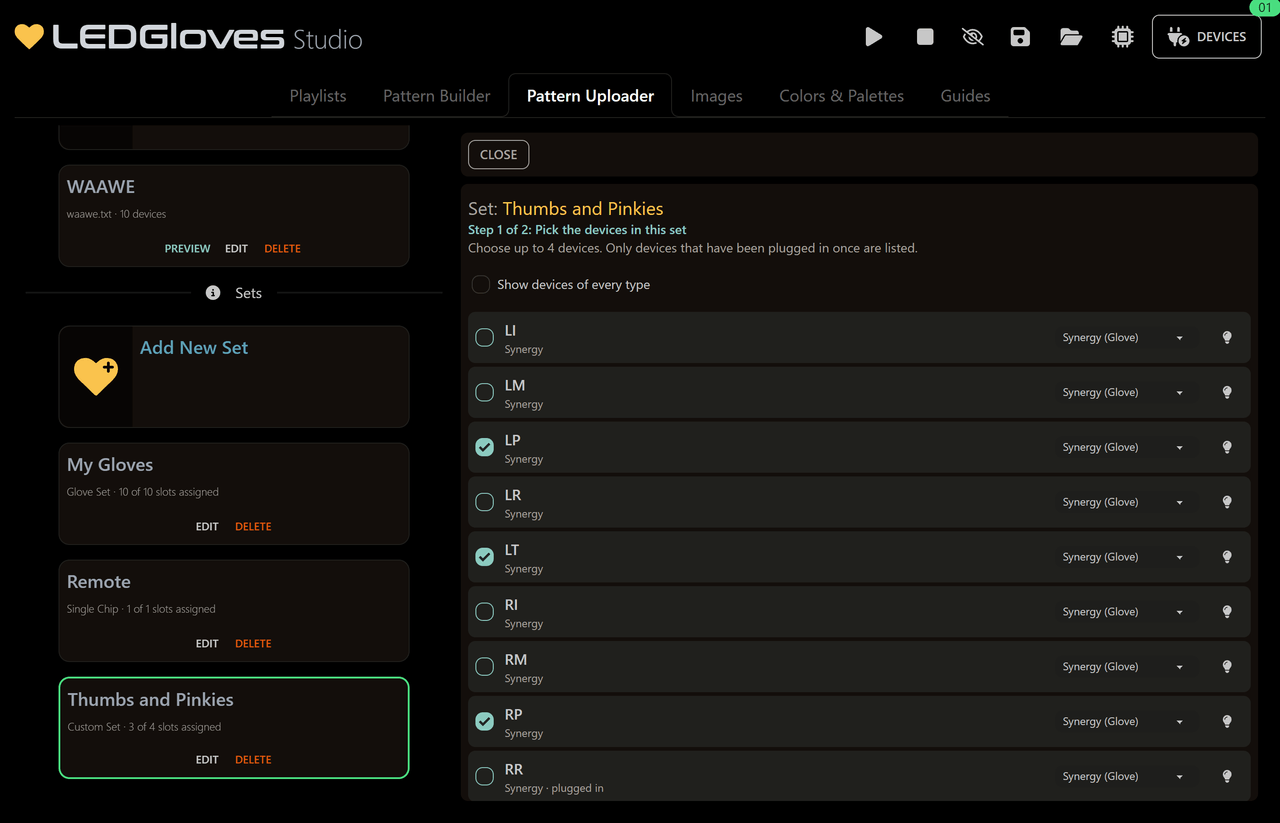
Section titled “Step 4: Pick the chips in the prop”Your new prop opens on the right side of the page at Step 1 of 2: Pick the devices in this prop.
- Tick each chip that belongs in this prop, up to the number of slots. Only chips that have been plugged into this computer before are listed.
- To find a chip, click its lightbulb to make it light up.
- The list only shows chips of the right type for the prop. If a chip is missing, tick Show devices of every type, or fix the chip’s type in the dropdown on its row.
- Click Next.
Step 5: Tell Studio which chip is which
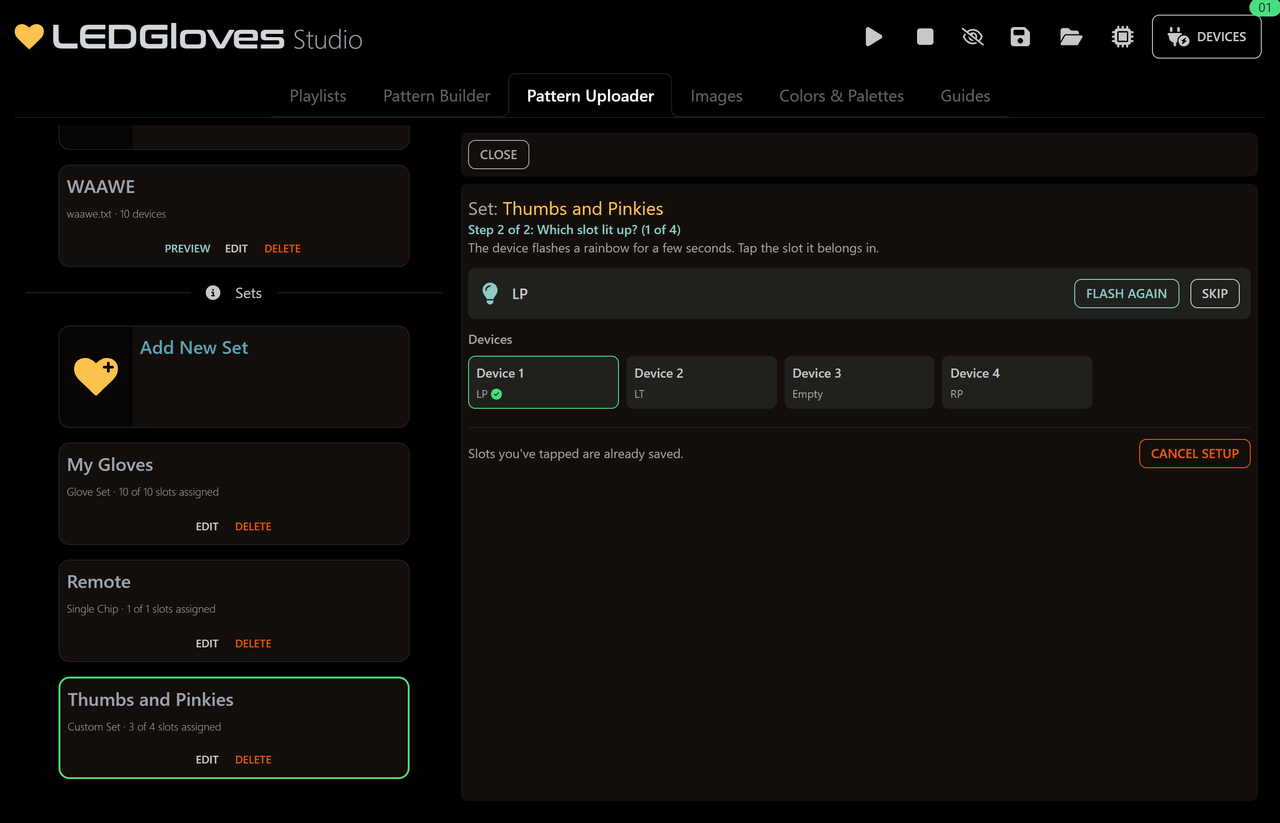
Section titled “Step 5: Tell Studio which chip is which”At Step 2 of 2: Which slot lit up?, Studio lights up your chips one at a time.
- Look for the chip flashing a rainbow.
- Click the slot it belongs in (for example Left Ring). The next chip lights up.
- Repeat until every chip has a slot.
- The hands are laid out as if you’re looking down at them, so the left hand runs Pinky to Thumb and the right hand Thumb to Pinky.
- Missed it? Click Flash Again. Click Skip to leave a chip out for now.
- Cancel Setup stops early. The slots you’ve already clicked are kept.
When the last chip has a slot, the prop opens so you can check it.
Changing a prop later
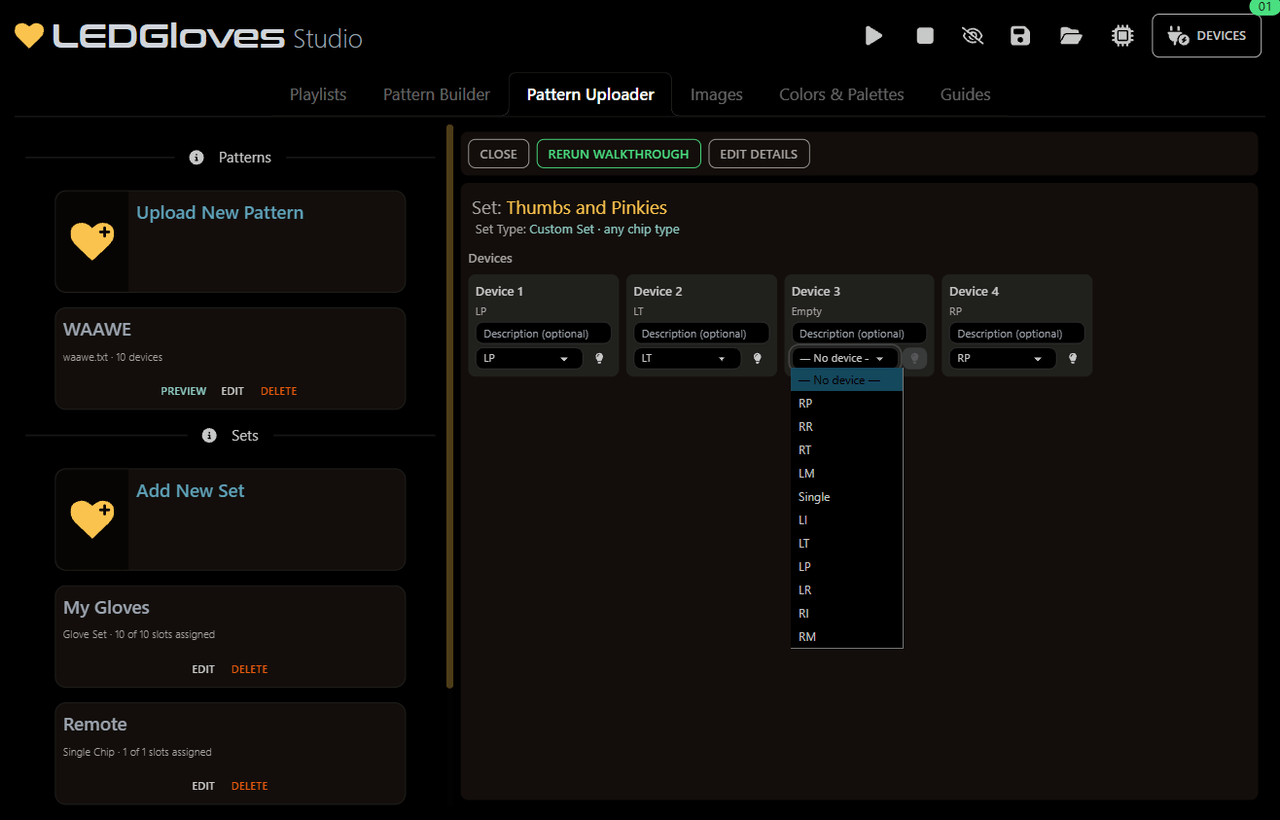
Section titled “Changing a prop later”Click a prop’s card to open it on the right. Each slot shows which chip is in it.
- Use the dropdown in a slot to put a different chip in it, or choose — No device — to empty it.
- Click a slot’s lightbulb to light up the chip in it.
- In a Custom Prop, each slot also has a short Description (up to 24 characters), like left shoe.
- Rerun Walkthrough runs Steps 3 to 5 again, starting with the prop’s chips already ticked.
- Edit Details changes the prop’s name. Click Save when you’re done.
- Close closes the prop.
Managing Your Props
Section titled “Managing Your Props”Every prop card has these buttons:
| Button | What it does |
|---|---|
| Edit | Opens the prop, the same as clicking the card. |
| Delete | Removes the prop from Studio. Click Confirm Delete Prop to finish. |
Deleting a prop removes it from every pattern upload that uses it.